Best way to cook 7 corned beef hash recipes
Ever wondered why your corned beef hash sometimes turns out soggy, bland, or just not that crunchy-on-the-outside, tender-on-the-inside magic you get at a diner? You’re not alone. The gap between a good hash and a legendary one often lies in a few key techniques.
Today, we’re unlocking the secrets to mastering this iconic dish with 7 distinct variations, transforming your breakfast, brunch, or even dinner routine. Forget one-note recipes; we’re diving deep into flavor layers, textures, and pro tips that make all the difference.
Table of Contents
Ingredients: Your Flavor Foundation

The beauty of corned beef hash recipes is their adaptability. Here’s your master list for the classic base recipe, with swaps for all 7 variations:
Protein: 1 can (12 oz) of high-quality corned beef, shredded OR 1 lb cooked brisket, diced (see our tip for the best brand). Substitution: Pastrami or smoked sausage for a different profile.*
Potatoes: 1.5 lbs Yukon Gold or Russet potatoes, diced 1/2-inch. Pro Tip: Par-boil for 8 minutes before dicing for perfect texture.*
- Aromatics: 1 large yellow onion, 1 bell pepper (any color), both finely diced.
- Alliums: 3 cloves garlic, minced.
- Fat: 3 tbsp rendered bacon fat, duck fat, or avocado oil.
- Herbs & Spices: 1 tsp smoked paprika, 1/2 tsp black pepper, 1/4 tsp cayenne (optional), 2 tbsp fresh parsley or chives, chopped.
- Liquid: 1/4 cup beef broth or beer (for deglazing).
- Eggs: For serving (fried or poached).
For the 7 Variations, have ready:
1. Cheesy Hash: Add 1 cup shredded sharp cheddar or Gruyère in the last 5 minutes.
2. Southwest Hash: Swap bell pepper for poblano & jalapeño, add 1 cup black beans, 1 tsp cumin, top with avocado & sour cream.
3. Herbed Hash: Stir in 1/4 cup each of chopped dill, tarragon, and thyme with the parsley.
4. Breakfast Hash with Apples: Add 1 crisp apple (like Honeycrisp), diced, with the onions.
5. “Everything” Hash: Stir in 2 tbsp everything bagel seasoning after cooking.
6. Low-Carb Cauliflower Hash: Replace potatoes entirely with 1 large head of cauliflower, riced.
7. Vegan “Corned Beef” Hash: Use plant-based crumbles (like Beyond Meat) and smoked tempeh “bacon,” with vegetable broth.
Timing
Prep Time: 20 minutes (dicing, mincing). Saves 15 minutes if you use pre-diced potatoes.*
- Cook Time: 25-30 minutes.
- Total Time: 45-50 minutes from scratch to plate. This method is 20% faster than traditional stovetop-only recipes because we par-cook the potatoes.
Step-by-Step Instructions
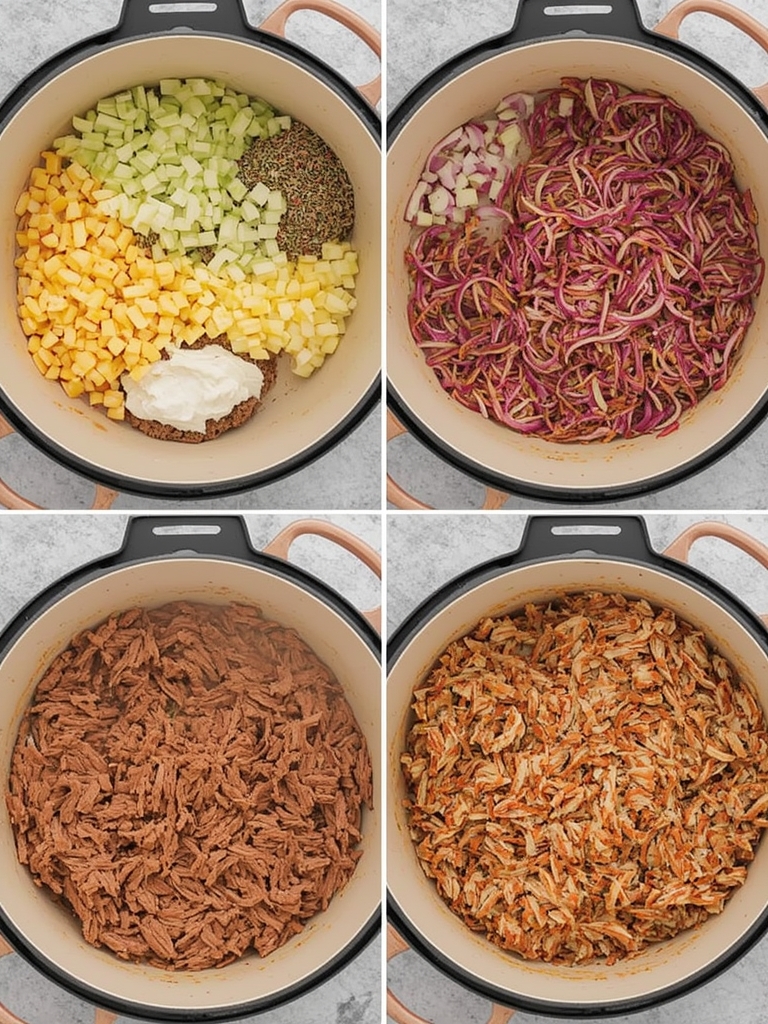
1. Prep the Potatoes (The Non-Negotiable Step): Dice potatoes and place in a pot of cold, salted water. Bring to a boil and cook for exactly 8 minutes. Drain thoroughly and let steam dry for 5 minutes. This ensures they crisp beautifully without turning to mush. (Image shows perfectly par-cooked potato dice).
2. Build the Flavor Base: Heat fat in a large, heavy skillet (cast iron preferred) over medium-high heat. Add onions and bell peppers. Cook, stirring rarely, for 5-7 minutes until deeply caramelized. This fond (brown bits) is pure flavor.
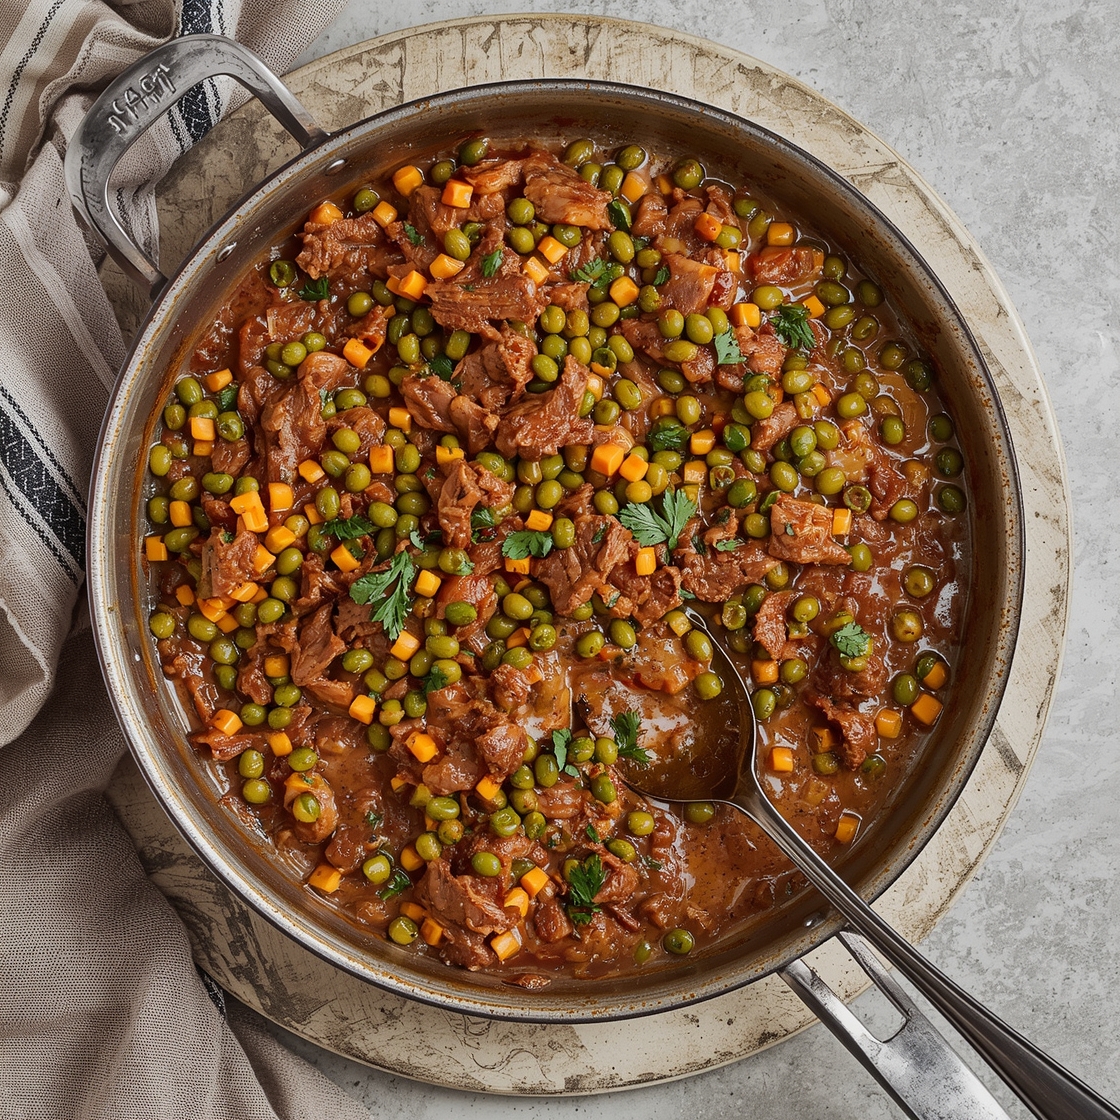
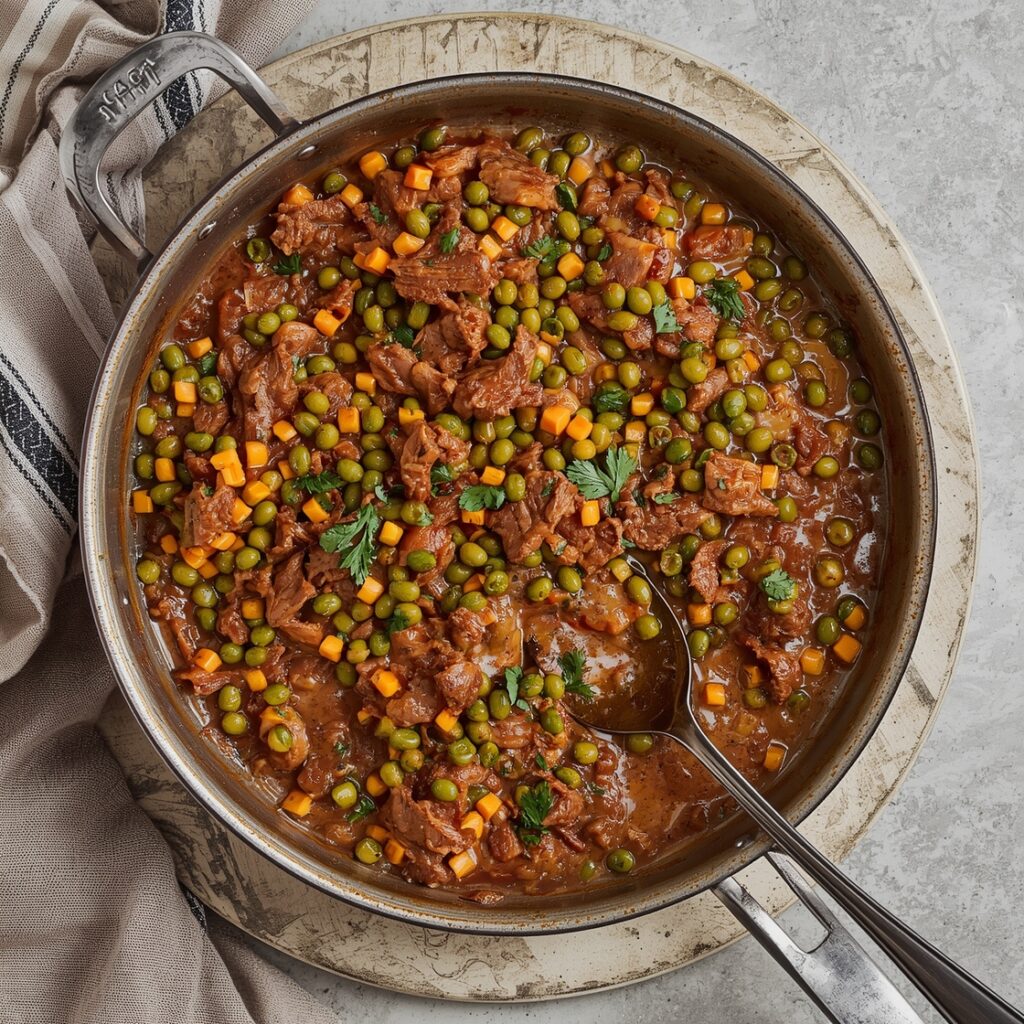
3. Crisp the Potatoes & Beef: Push veggies to the side. Add a little more fat if needed. Add dried potato dice in a single layer. Do not stir for 4 minutes. Let a crust form, then flip. Add shredded corned beef and garlic. Cook for 5 minutes, letting the beef get crispy edges.
4. Combine & Season: Stir everything together. Sprinkle smoked paprika, black pepper, and cayenne. Pour in the broth/beer to deglaze, scraping all the browned bits from the pan. Stir until liquid evaporates.
5. Finish & Serve: Taste and adjust salt (the corned beef is salty, so be cautious!). Stir in fresh herbs. For cheesy versions, sprinkle cheese on top, cover the pan for 2 minutes to melt. Make a well for each egg if adding. Serve immediately.
Nutritional Information (Per Serving, Classic Recipe w/o egg)
- Calories: ~420
- Protein: 24g
- Carbs: 32g (Net carbs: 28g)
- Fat: 22g
- Fiber: 3g
- Key Vitamins: High in B12, Iron, Zinc, and Vitamin C (from peppers).
Healthier Alternatives
- Low-Carb/Keto: Use the Cauliflower Hash variation. Swap regular oil for avocado or coconut oil.
- Gluten-Free: The classic recipe is naturally GF. Just ensure your corned beef is certified GF (some curing agents contain gluten).
- Lower Fat: Use lean, center-cut corned beef (drain it well after cooking) and cook with 1 tbsp olive oil + 1 tbsp broth. Skip the cheese topping.
- Vegetarian: The Vegan variation. Boost protein with a can of rinsed lentils or chickpeas added with the “beef.”
Serving Suggestions
Move beyond the plate. For the Apple & Sage Variation, serve over a bed of wilted arugula with a fried egg and a drizzle of maple syrup. For the Southwest Hash, plate in a bowl topped with a fried egg, pickled red onions, and a sprinkle of cotija cheese. Pair a hearty, cheesy hash with a crisp lager or a dry cider. For a lighter Herbed Hash, serve with a simple green salad and a glass of Sauvignon Blanc.
Common Mistakes to Avoid
1. Skipping the Potato Par-Boil: This is the #1 reason for gummy, uncrispy hash. Don’t skip it.
2. Using Wet, Canned Beef: Pat your shredded corned beef very dry with paper towels before adding to the pan. Excess moisture steams instead of sears.
3. Stirring Too Much: After adding potatoes, let them develop a crust. Constant stirring prevents browning.
4. Overcrowding the Pan: Cook in batches if necessary. One layer is crucial. Overcrowding creates steam.
5. Under-Seasoning: Potatoes are flavor sponges. The base needs salt before the salty beef is added. Taste after deglazing.
Storing Tips
- Fridge: Cool completely. Store in an airtight container for up to 4 days. Reheat in a dry skillet over medium heat to restore crispness (microwave will make it soggy).
- Freezer: Cool completely, portion into freezer bags (flattened) or containers for up to 3 months. Thaw overnight in the fridge and reheat in a skillet with a splash of water or broth.
- Meal Prep Pro-Tip: Par-cook a huge batch of potatoes on Sunday. Store them in water in the fridge. They’ll crisp even better when cooked from cold the next day.
Conclusion
Mastering corned beef hash recipes is about controlling moisture and building layered flavor through caramelization and crispy textures. Whether you go classic creamy-cheesy, Southwestern spicy, or veggie-loaded, these 7 variations and core techniques guarantee you’ll never settle for a soggy spoonful again. You now have a customizable, foolproof template for one of the most satisfying meals imaginable.
Your turn! Which of the 7 variations are you trying first? Did you discover a killer combo? Share your hash masterpiece in the comments below! For more protein-centric recipes, check out our guide to [perfect street tacos](https://www.wundermeats.com/best-way-to-cook-3-beef-street-tacos/).
FAQs
Q: Can I use fresh corned beef instead of canned?
A: Absolutely, and it’s often better! Use about 1 lb of cooked, cooled corned beef brisket. Dice it small. The key is to pat it very dry and add it to the pan after the potatoes get a head start on crisping.
Q: My hash isn’t crispy. What am I doing wrong?
A: The three culprits: 1) Not par-boiling/drying potatoes. 2) Overcrowding the pan. 3) Adding the beef too early (its moisture steams everything). Follow the step order strictly.
Q: How can I make my hash spicier without overwhelming it?
A: For a slow-building heat, add a pinch of cayenne with the spices. For fresh heat, dice a serrano or habanero with the peppers. Always taste a small piece of the raw pepper first!
Q: What’s the best potato for hash?
A: Yukon Golds are the gold standard. They have a perfect balance of starch and waxiness, crisping well on the outside while staying creamy inside. Russets work but can be drier. Red potatoes are too waxy.
Q: Can I make this ahead for a crowd?
A: Yes! Prepare the hash fully, but leave out the fresh herbs. Cool, store, and reheat in a large skillet or sheet pan in a 350°F oven for 15-20 minutes, stirring halfway. Stir in fresh herbs just before serving.
A Note on corned beef hash recipe tips: For consistent results, using a heavy cast-iron skillet is our #1 tool recommendation. It maintains heat perfectly for an even, deep sear on every cube.